Hi friends! Are you ready for something exciting? Check out this beach-inspired DIY sea glass Christmas tree craft, perfect for showing off all your stunning sea glass collection during every holiday season.
DIY Sea Glass Christmas Tree
One of the family’s favorite activities at our cottage is collecting sea glass with the kids. Technically it should be known as beach glass given we’re on a lake rather than ocean; over the years though, we’ve come to call it sea glass instead. Each kid takes along their own little baggie so they can sort all their finds by color when we get back home – we could spend hours searching the beach for treasures!
As we often post DIY tutorials for creating driftwood crafts like our crab wall art, concrete and driftwood sailboat decor, driftwood reindeer ornaments and large driftwood Christmas tree, we were excited to present this simple sea glass craft as something different. If you don’t already own enough sea glass for this craft project, purchasing some can also help – check with local nurseries or craft stores!
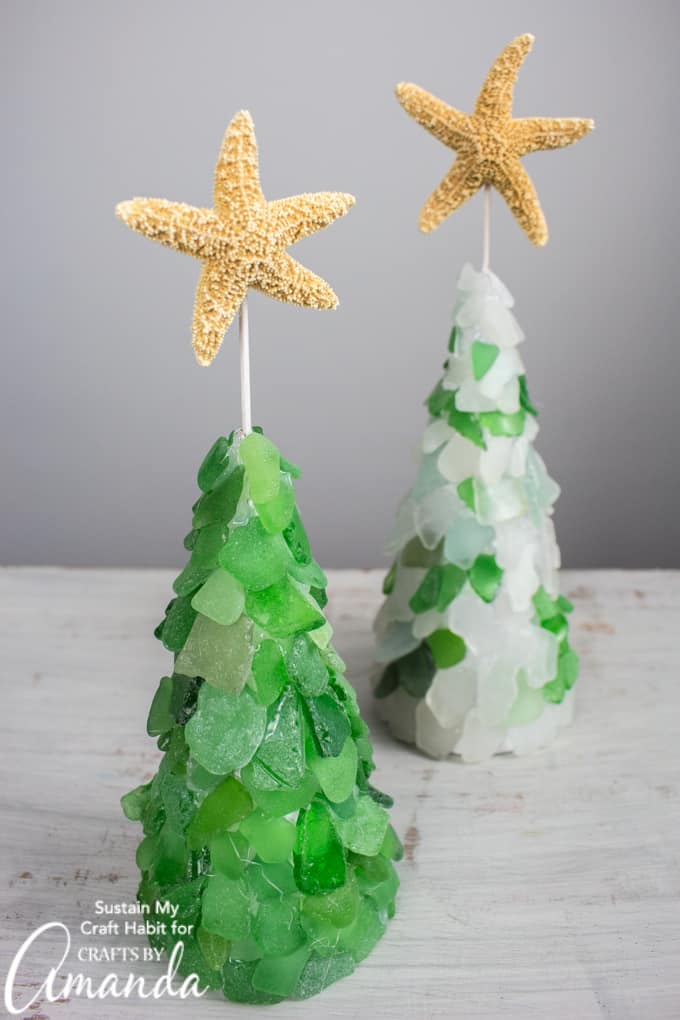
These sea glass Christmas trees are beautiful! Not only are they adorable with their starfish topper but the natural glass used is just stunning. Other creative uses for your sea glass collection could be creating macrame seaglass necklaces, planters or simply adding loosely into a beach-inspired terrarium.
How to Build a DIY Sea Glass Christmas Tree:
Step One – Prep Cones
To prepare cones, first poke a hole through their top using an awl or wooden skewer (a toothpick may not be strong enough).
To adjust the size of the cones so they will form trees of various heights, simply cut off some of their height at the base of one cone. Use a utility knife or pair of scissors to trim away along its taped edge until cutting into it reduces its height before peeling away and discarding tape before moving on to next cone.
Start by painting cones and toothpicks white using acrylic paint. Allow it to fully dry before proceeding to step two.
Prep the Star Topper:
Turn the starfish embellishments so their backsides are facing upward. Apply a dab of glue to its underside, placing one of the painted toothpicks so one end hangs past the starfish embellishment, until the glue sets, before setting aside for now.
Applying Sea Glass: Sophisticated techniques exist for applying actual sea glass collected on beaches; be sure to fully clean and dry it prior to glueing it onto anything. Preheat a hot glue gun for best results, working quickly but carefully as the glue sets fast from this source can result in injury from its hot temperature.
As part of our first Christmas tree, we used only green glass. Beginning at the base of the cone, apply a dab of glue as shown and press one piece of sea glass over it – but make sure not to extend beyond its base! Continue around its rim gluing pieces of glass at a time.
For the second row, overlap the bottom edges of each piece with each sea glass from the first row.
Finishing Your Sea Glass Christmas Tree: Once the glue has fully set, remove any loose glue strands and secure each tree by inserting an end of a toothpick into its hole at the top of its cone to attach its star ornaments.
Speaking of Christmas trees, here’s another fun tree craft you might enjoy making: Wood Slice Trees are simple to construct using foam cones and rustic wood slices! Plus they make for adorable decorations!
For those living in coastal-themed homes, this Coastal Branch Tree for Christmas would make the ideal addition to their holiday decorations!